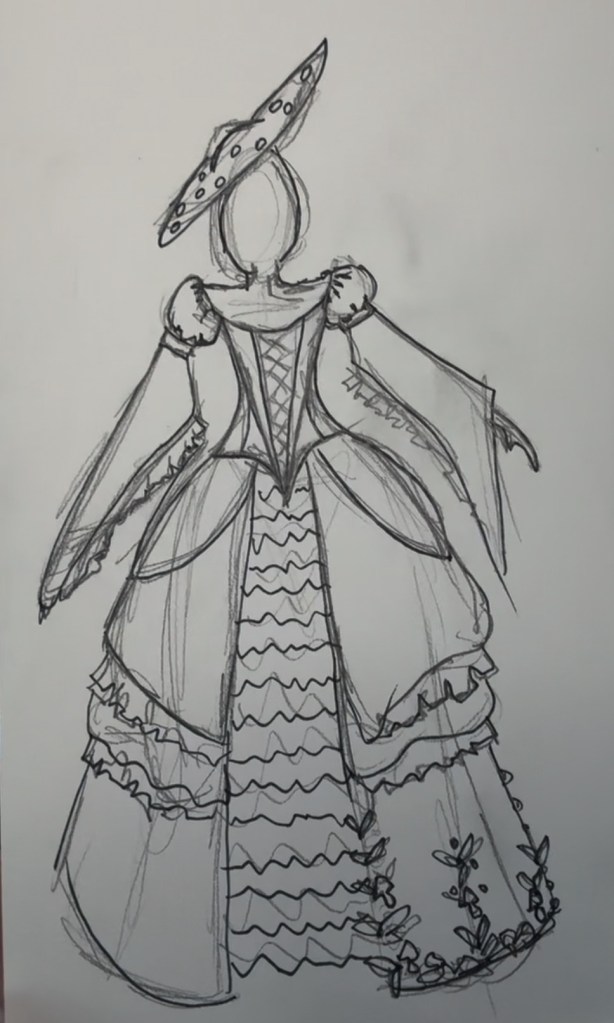
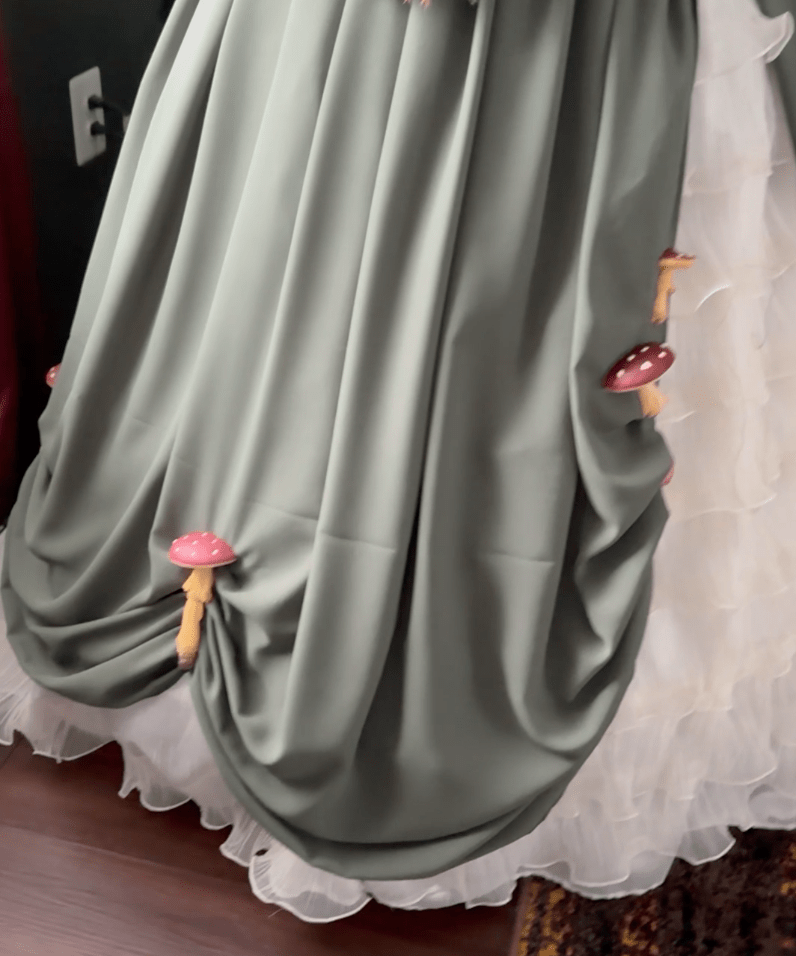
After scoring some amazing squishy red faux mushrooms last year, I wanted to make a costume with them but wasn’t sure how I wanted to design it.
After some sketching, I landed on something like this:
Materials Used: [see hat blog for those materials]
– Various thrifted fabrics
– Silicon glue (E6000 would probably work too)
– Grommets
– Interfacing (I prefer medium, iron-on)
– Steel spiral boning & wire cutters
– RedThreaded stays pattern (any of theirs are amazingly fitted! I’m a 38″ bust, 30″ waist, 42″ hip for reference)
– Simplicity 8881 (I just used the sleeves, but any pattern poofy sleeves would work)
*As an Amazon Associate I earn from qualifying purchases.
Note: this video shows the final garment assembled.
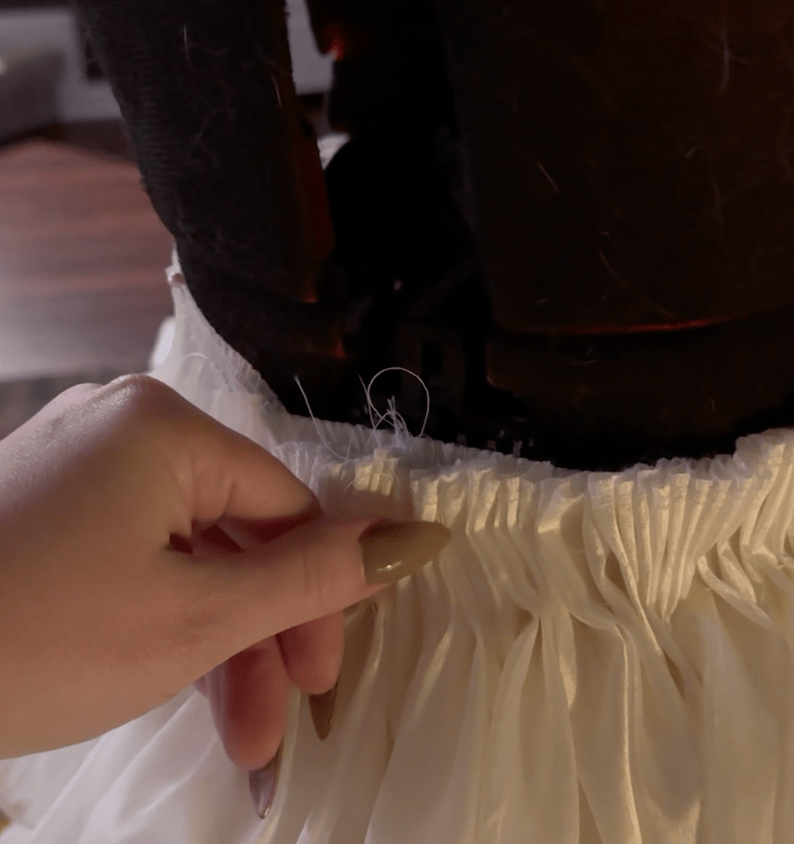
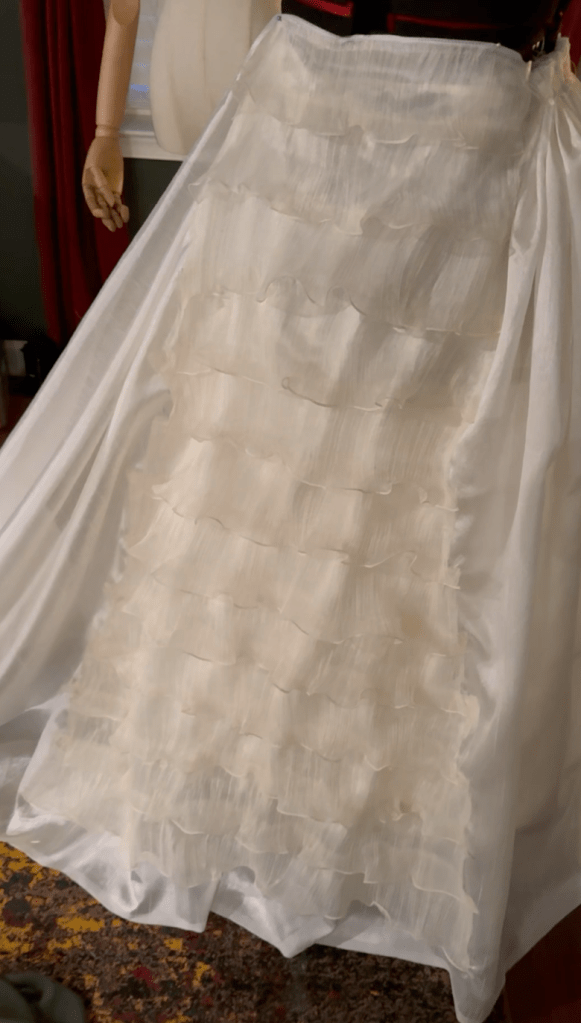
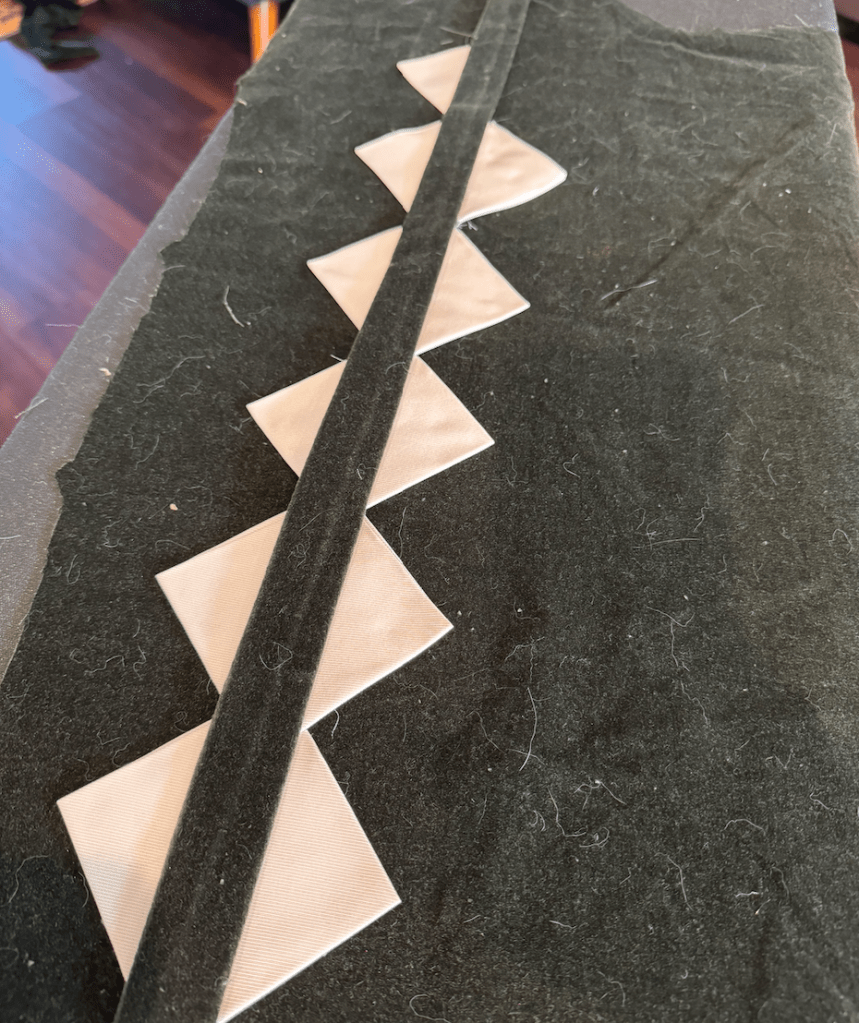
I always like to start off by making the skirt (if I’m doing separate pieces). I started by making a base skirt and cartridge pleating the top, while leaving the front un-pleated so it will lay flat. You can see how this looks in the photo below. The skirt is essentially a huge rectangle shape, with the front being a triangle-ish shape. From there, I sewed lines of the pleated sheer ribbon fabric just to the front and along the very bottom edge (since those are the only parts that’ll be seen). Then I made a waistband that closes with hook/eyes.
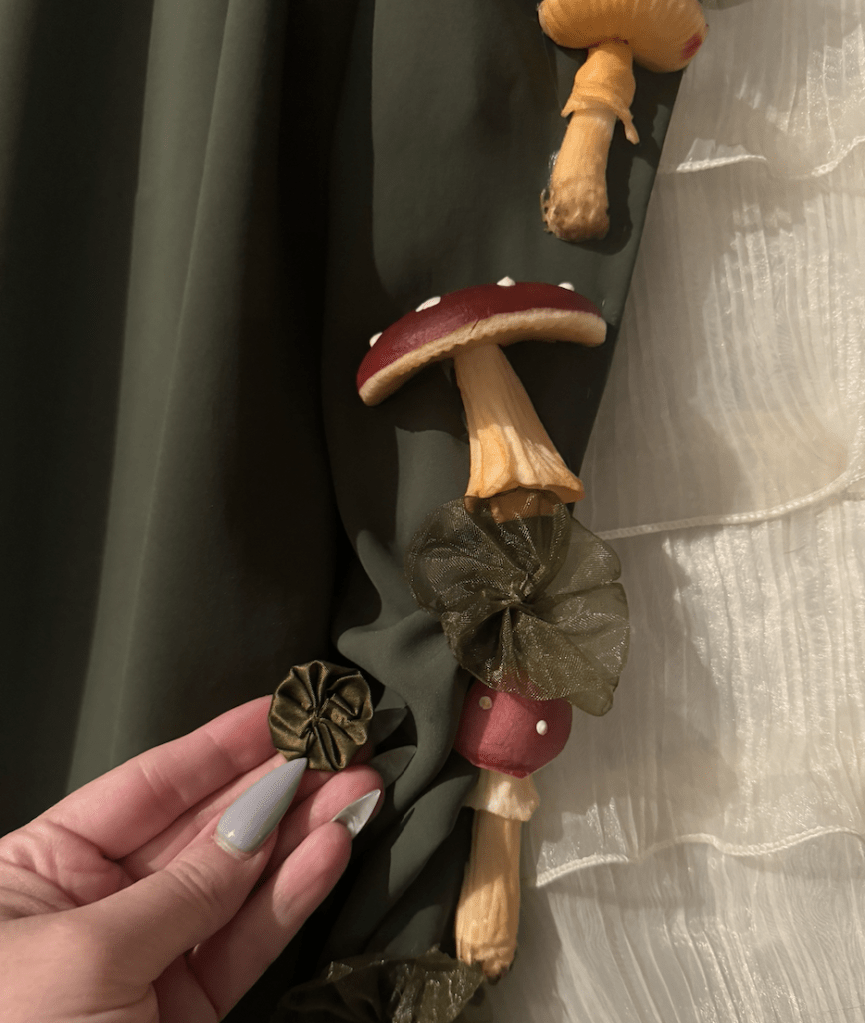
After making the “mushroom gills” underskirt, I next made the green mushroom overskirt that ties at the very front (the tie is hidden by the corset once it’s all assembled).
I created a scalloped effect at the bottom edge by creating tiny small knots in the fabric after making a pleat, spaced up every half inch or so, for a total of about 5 knotted pleat at each scallop row.
Then I made a ton of little fabric pinwheels or “yo-yos” using little stencils I had of various sizes. The mushrooms and yo-yos were glued to the edges of the overskirt, and then I also stitched little fabric pearls along the edges too.
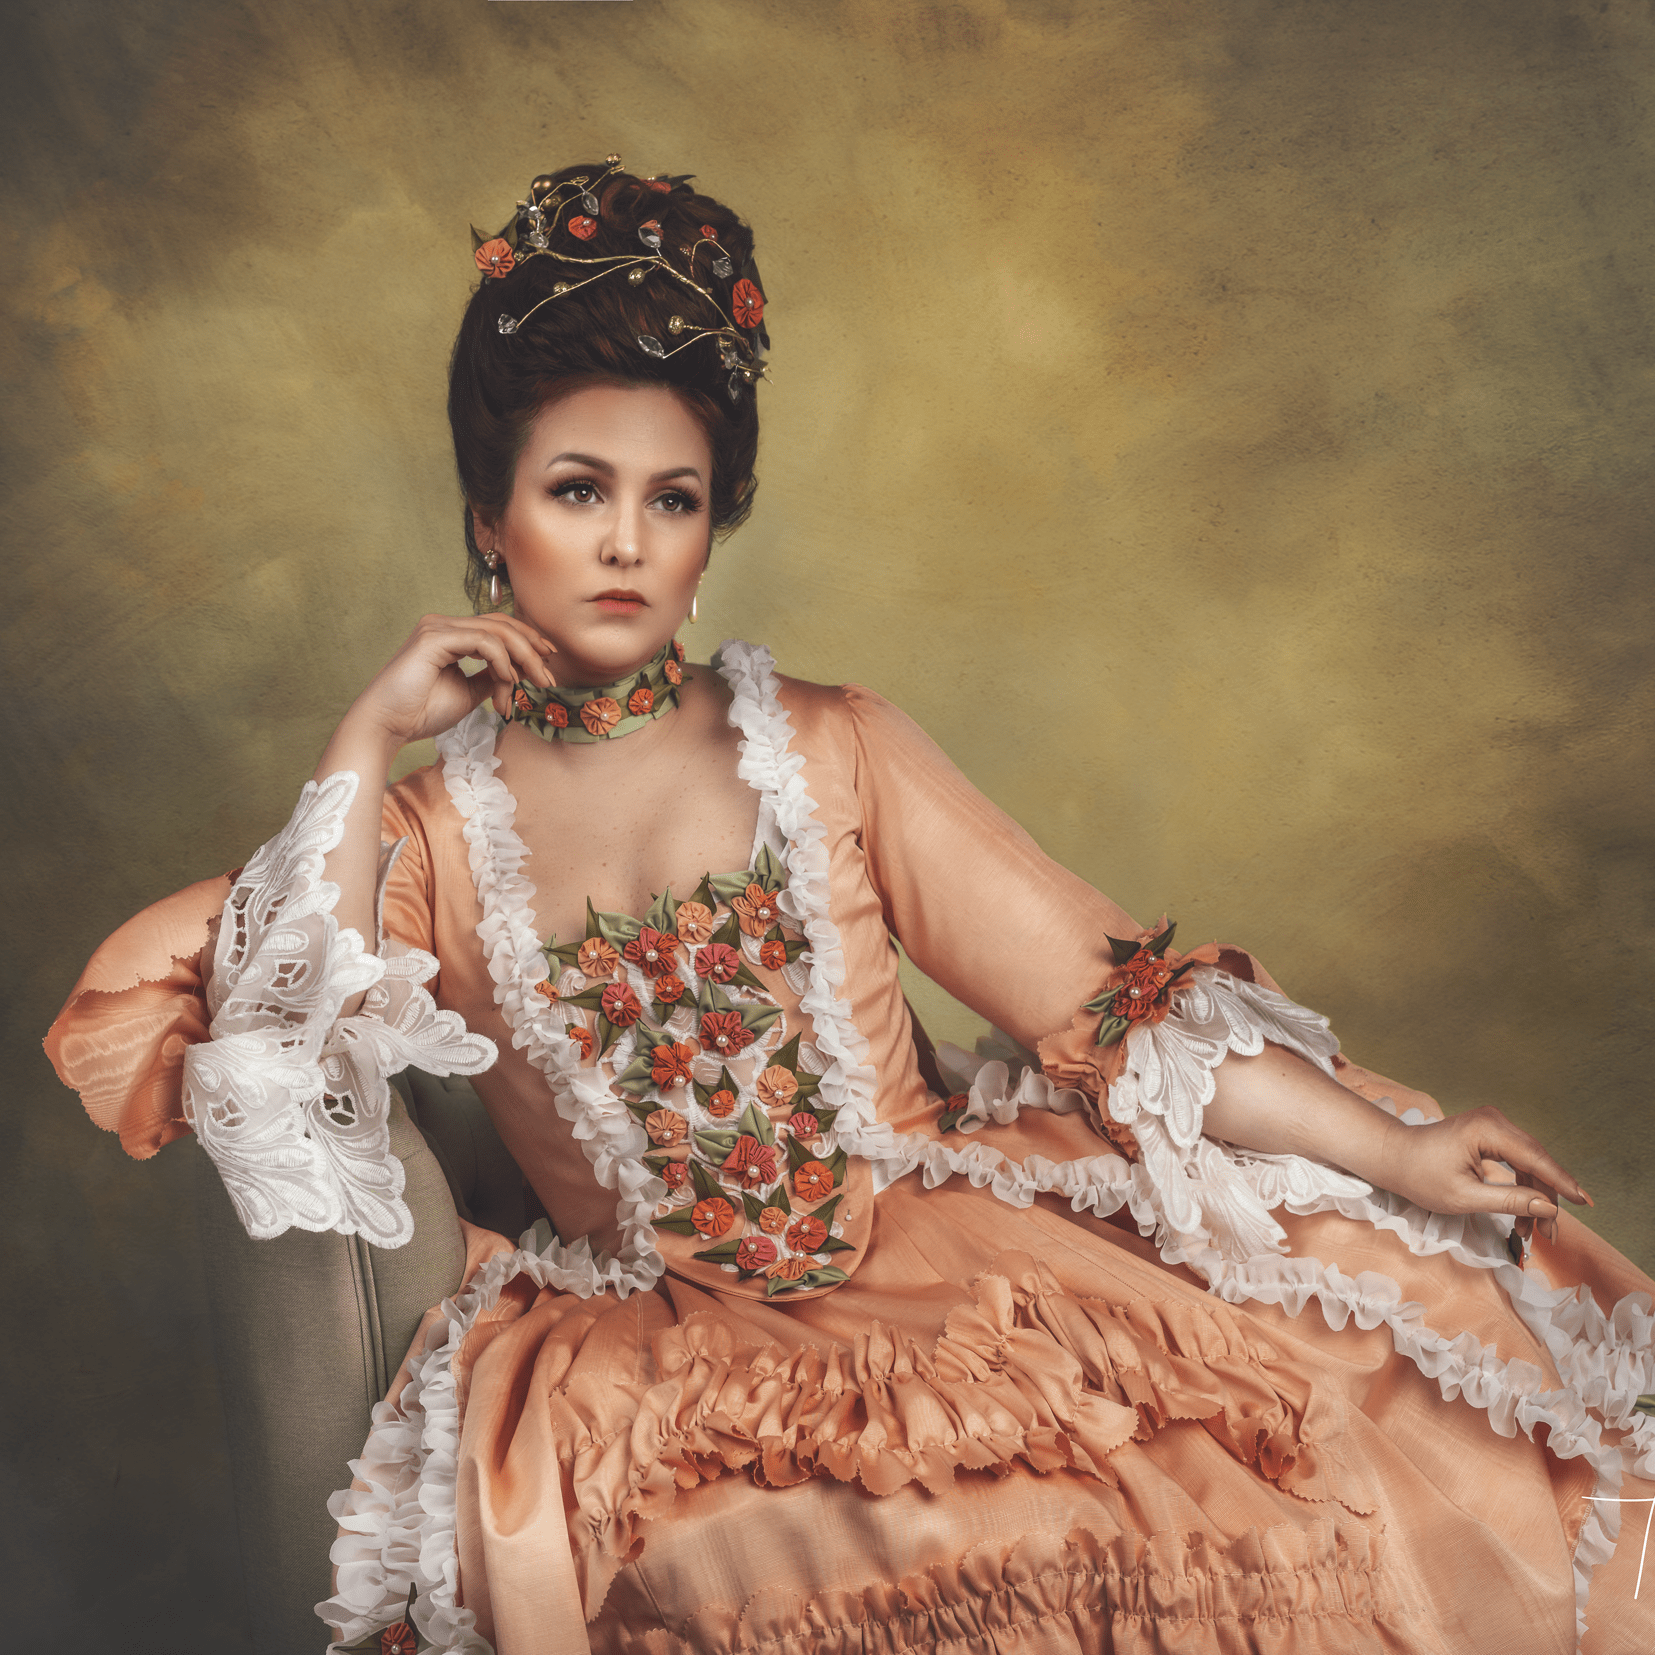
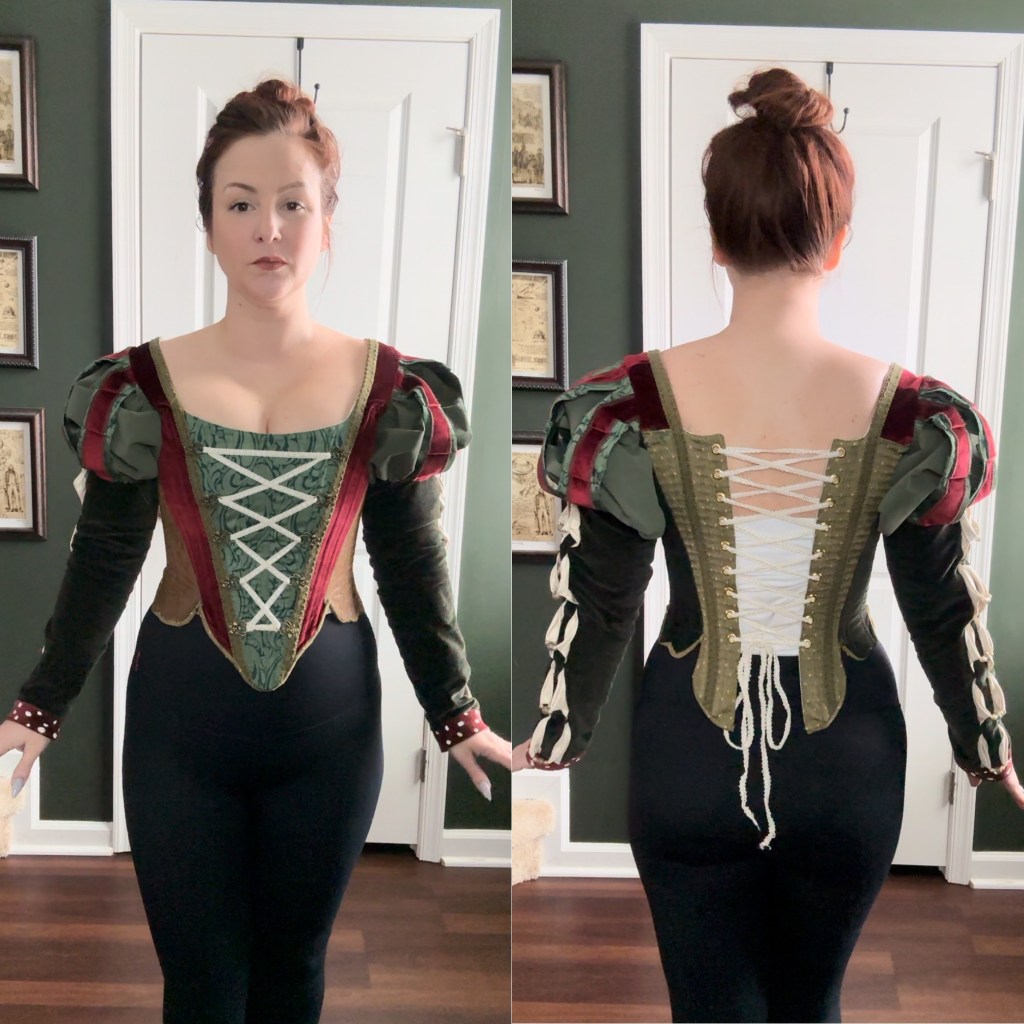
In true fashion, I decided to make an overly complicated corset top. I essentially started with a corset pattern I like (the Redthreaded one hyperlinked in this blog) and then altered it and added sleeves. So the top is incredibly boned (with spiral steel) and has grommets for tying up in the back. I prefer this method so that tops are very fitted and also can be adjustable if you gain or lose weight. I don’t always make a modesty panel, but I did add one into the corseted top later (not photographed below).
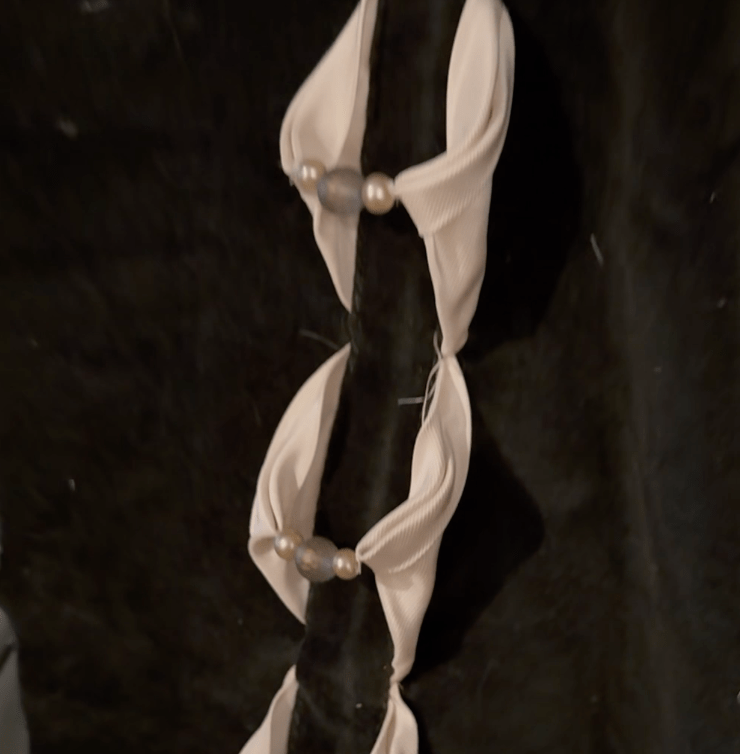
After making the base part of the corset, I utilized a method I saw on social media for doing the fancy faux pleating at the sleeve length. And then each triangle is joined with a set of pearls. For the shoulder poof part, I just sort of made this up. When making the fancy fabric strips, they only need to be about 1 inch total longer than the pattern template. Then you baste the strips right over the shoulder poof fabric at the top and bottom edges, and make the sleeve as normal.
The sleeve cuff spots were hand painted with white fabric paint to look like little mushroom spotted fabric.

Leave a comment