
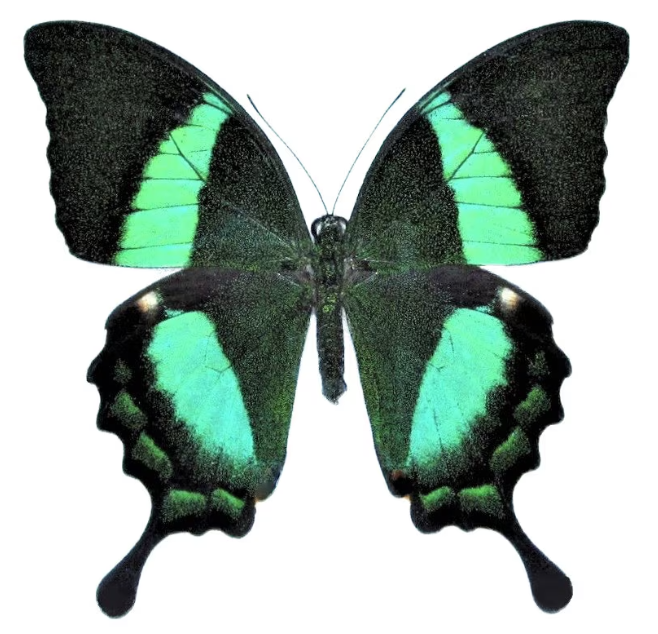
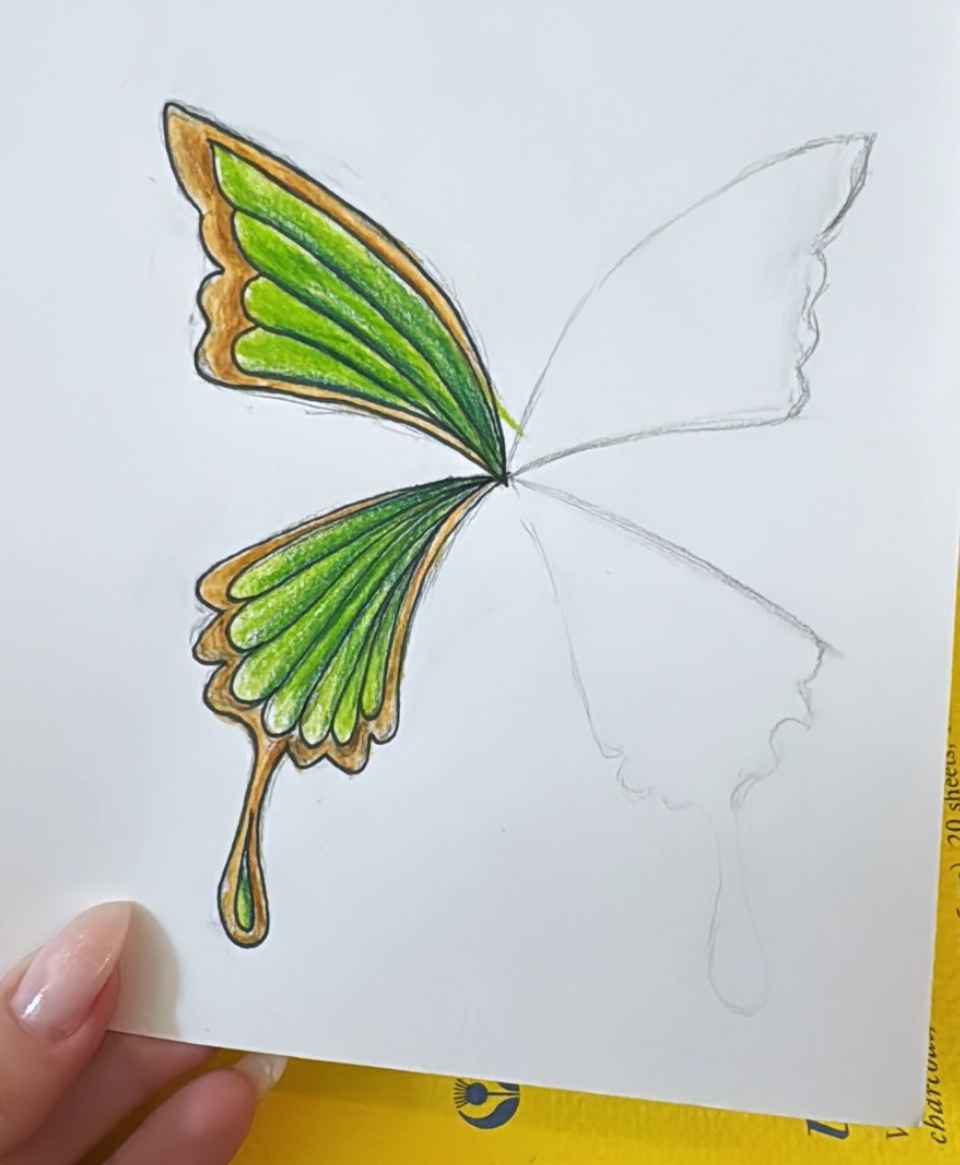
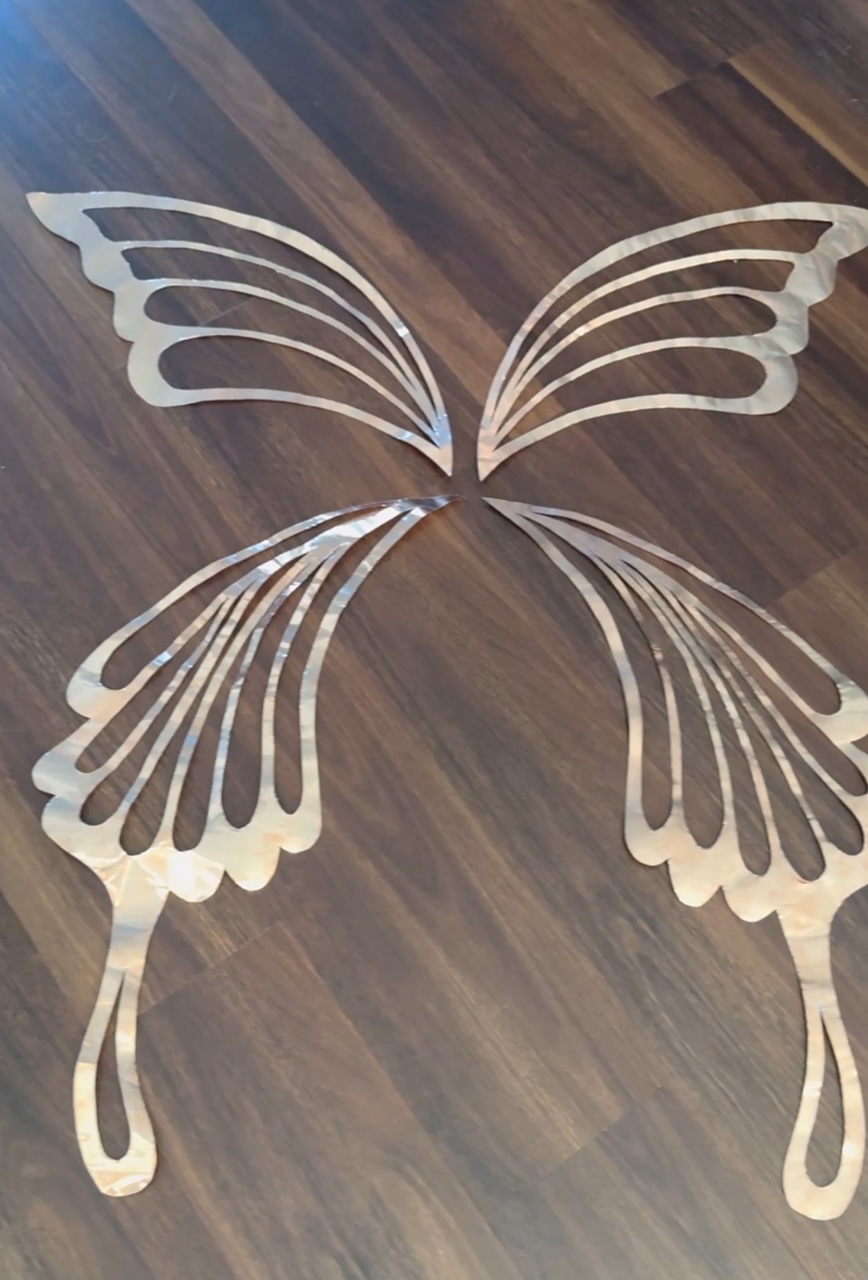
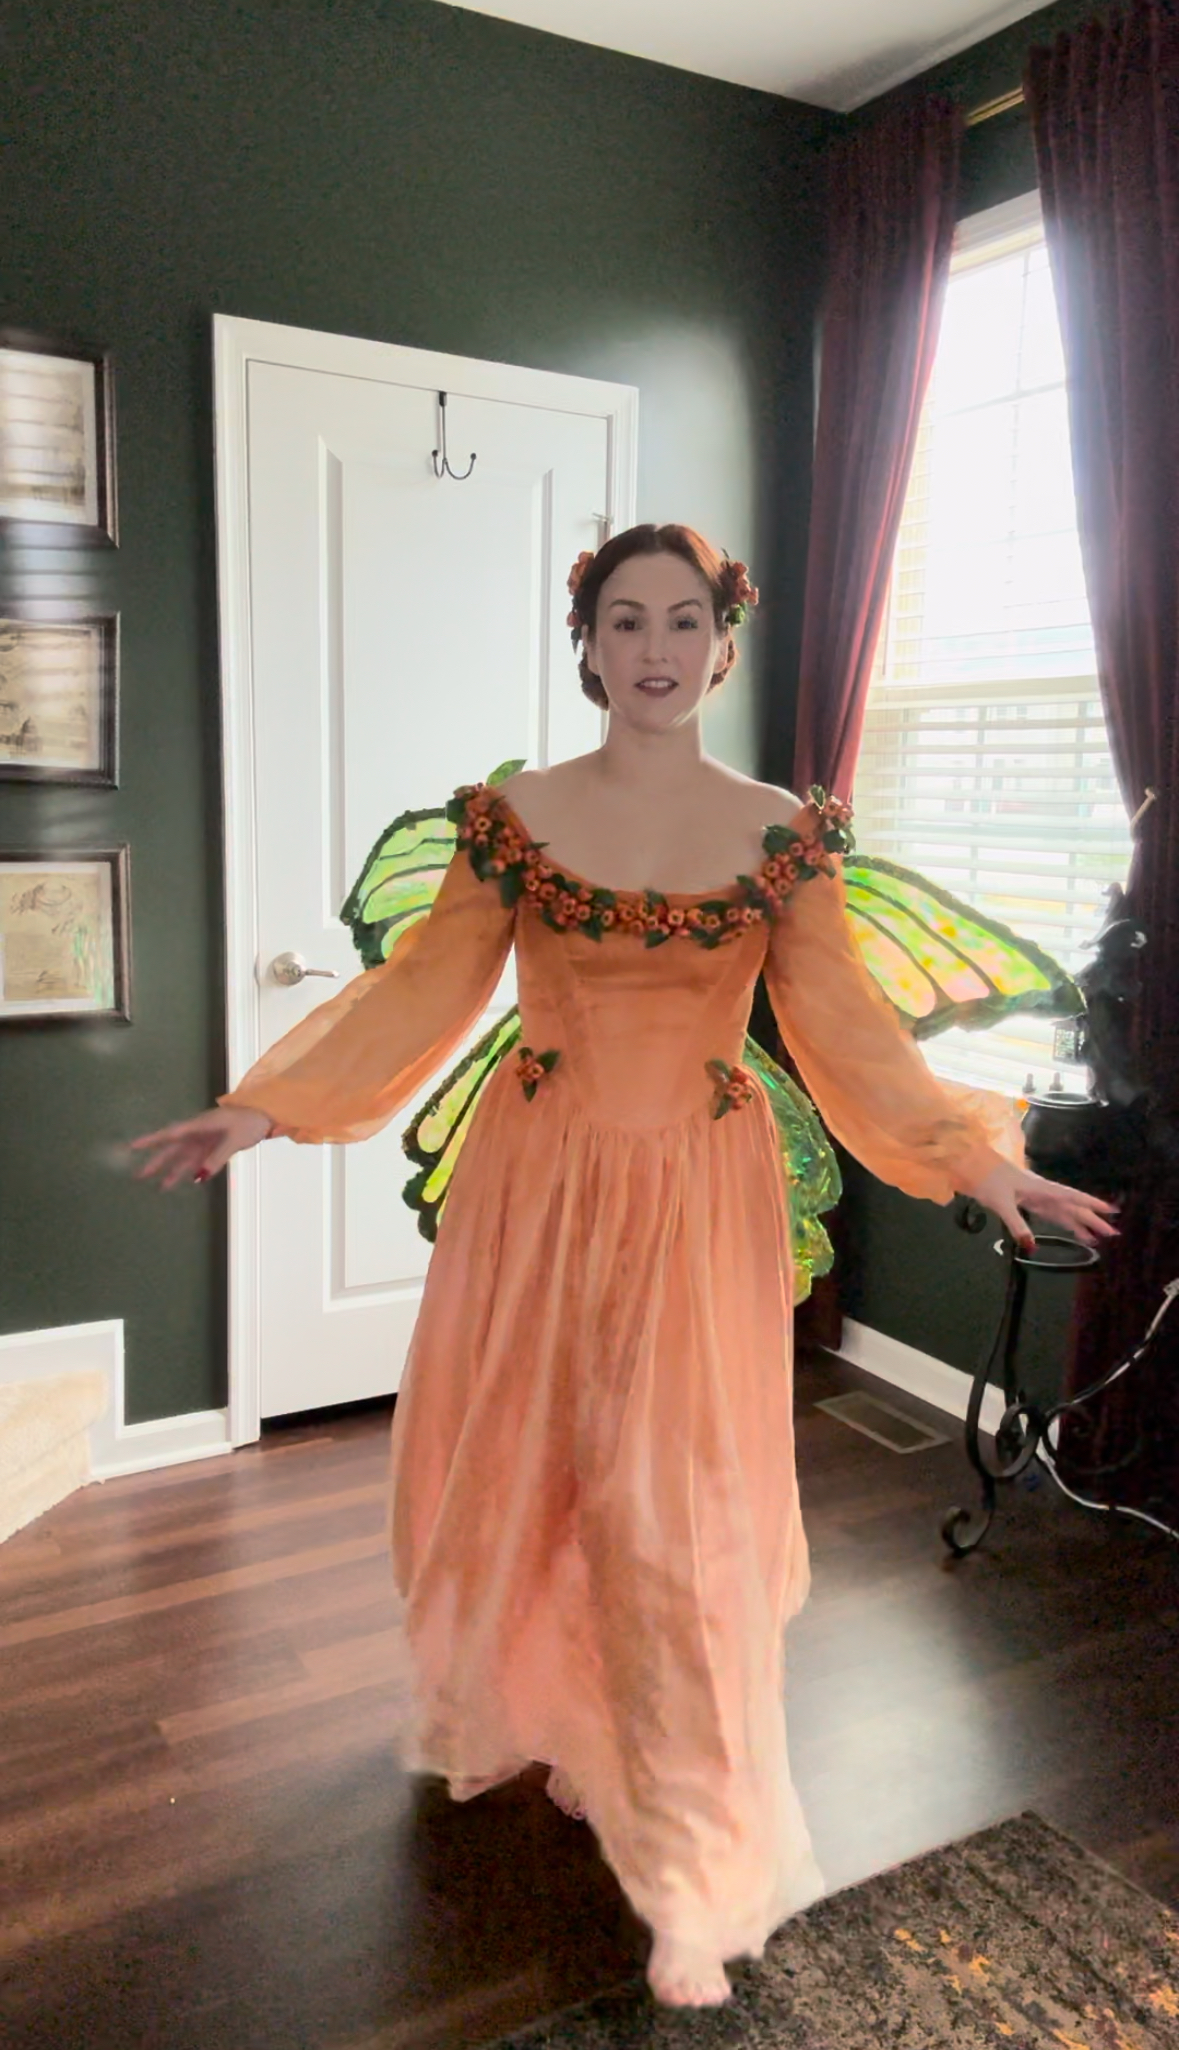
I started by looking for other tutorials available online, and although there were many different ones, I found a construction one and painting one from Fancy Fairy Wings and Things to be particularly helpful. So definitely go check those out! One thing they recommended (that I thought was really great advice) was to look to nature for design ideas, so as to avoid copying another artists’ designs. For mine, I found a photo of a green swallowtail and then sketched it to look a little more art nouveau in style:
I’m also sharing this tutorial as a mix of additional ideas and what NOT to do that ended up not working so well for me, or things I’d do differently next time.
Materials Used:
– Alcohol ink blending solution
– Alcohol ink blending applicators
– Copper sheets (I used 36 gauge, but I’d recommend much thinner like 38-44 gauge)
– Copper wire (14 gauge)
– Shiny brocade (to cover wire)
– Washers
– Heat gun
*As an Amazon Associate I earn from qualifying purchases.
Note: this video shows the construction highlights
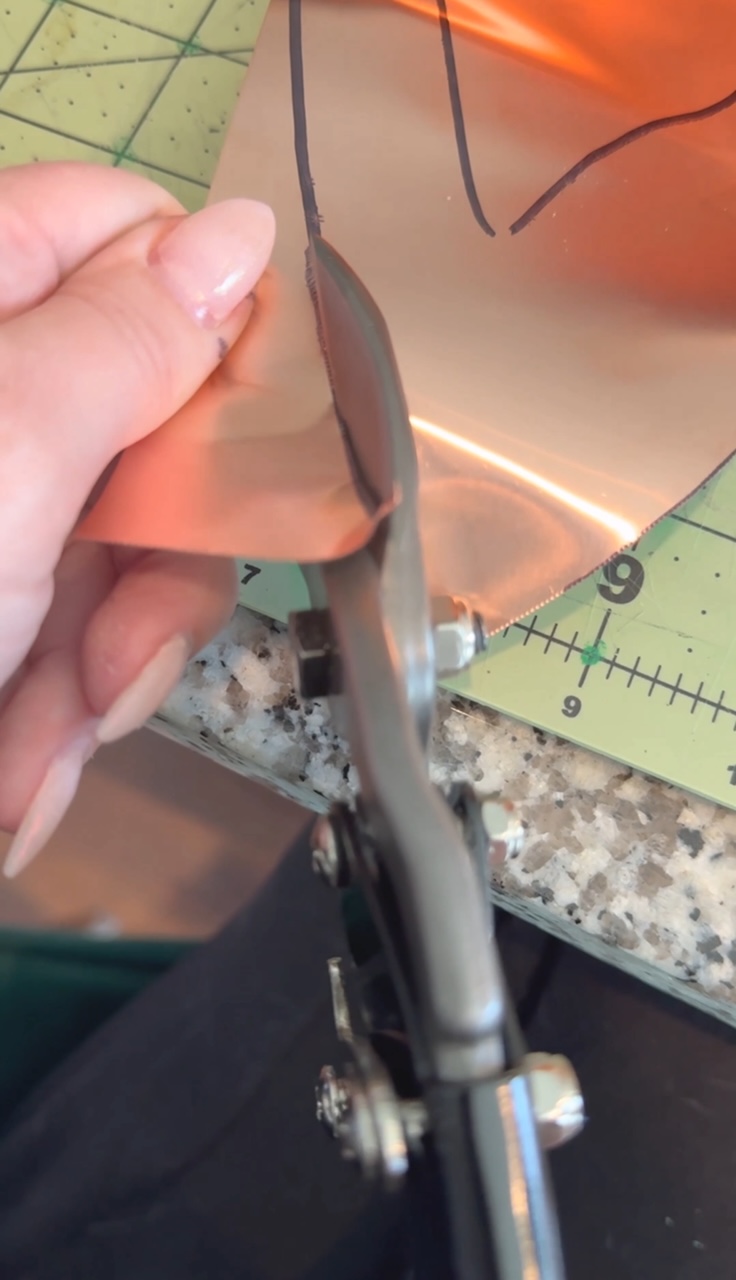
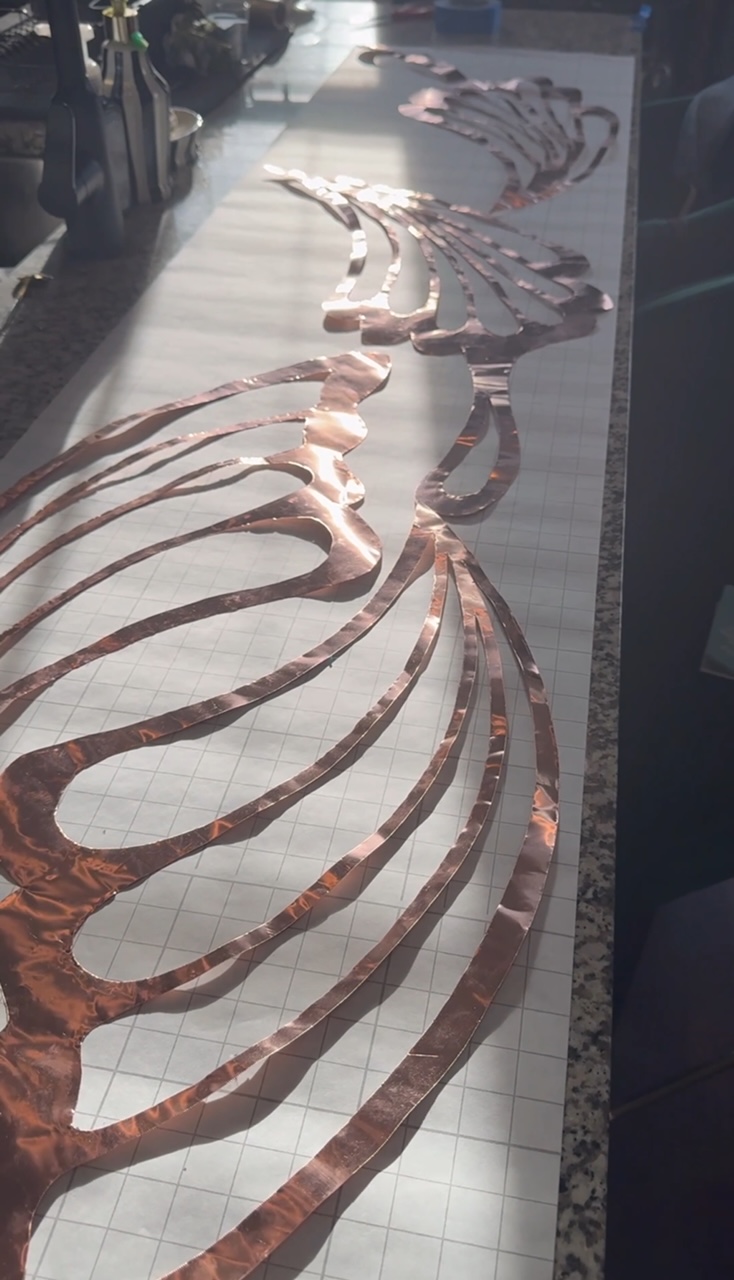
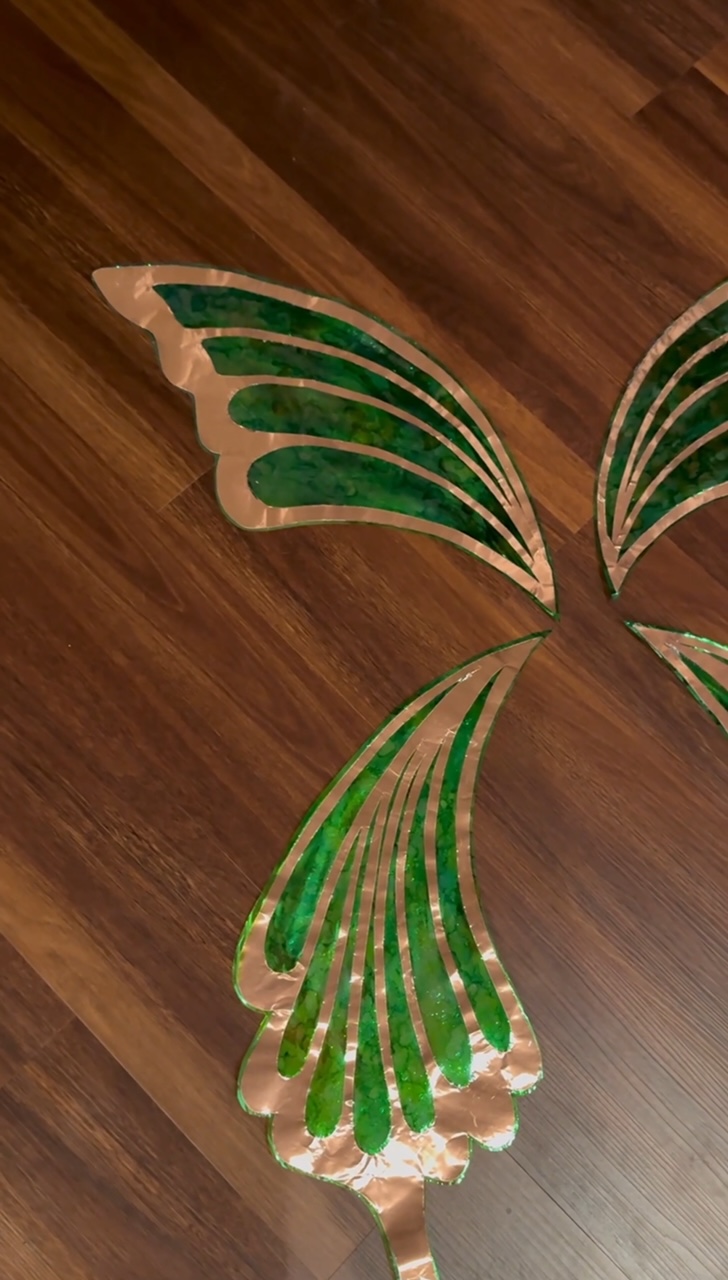
First step is to make a big stencil. I always save the brown paper that comes in Amazon packages, so I slightly ironed it and drew out the design with a pencil and then traced in Sharpie. Then after you cut it out, you’ll trace it onto the copper sheet with the sharpie. The Sharpie lines come off with rubbing alcohol.

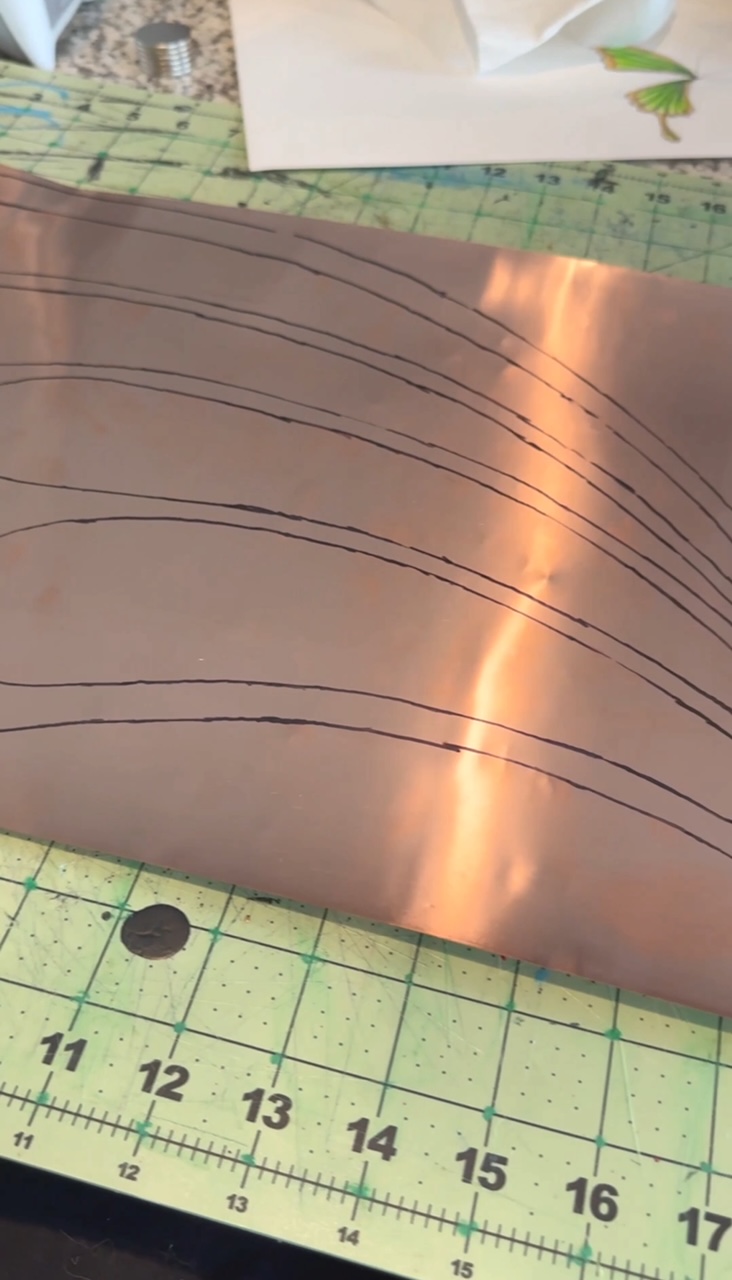
I used my wire cutters for the outside edge and then my Excel blade for any inner, smaller cuts that were harder with my cutters.
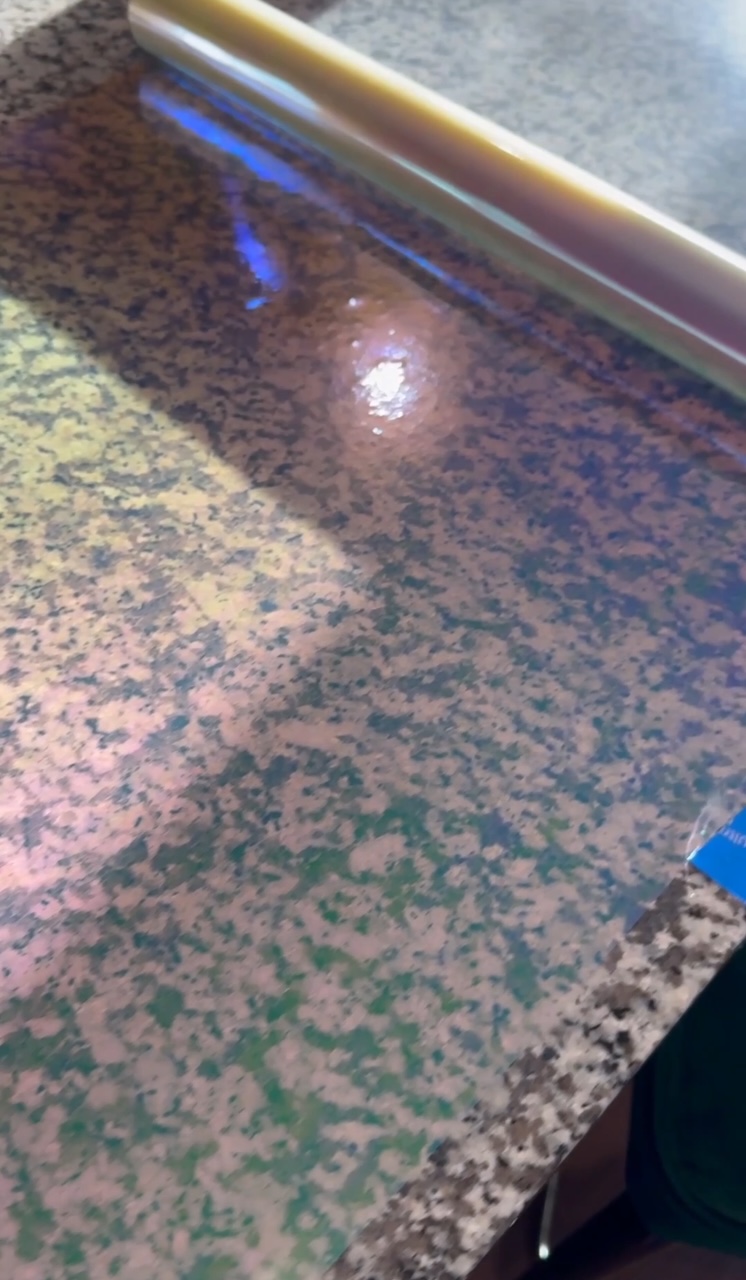
Once the aluminum pieces are cut out, then you’ll lay out the Heat’n bond sheet (white side up). Then you’ll peel back the white paper, leaving the clear laying flat down. I used painter’s tape to keep the edges flat down. Then you’ll carefully roll your cellphone over the top of the Heat’n bond, being careful to avoid bubbles. *Again– this is where I highly suggest watching the tutorial videos cited in the intro!*
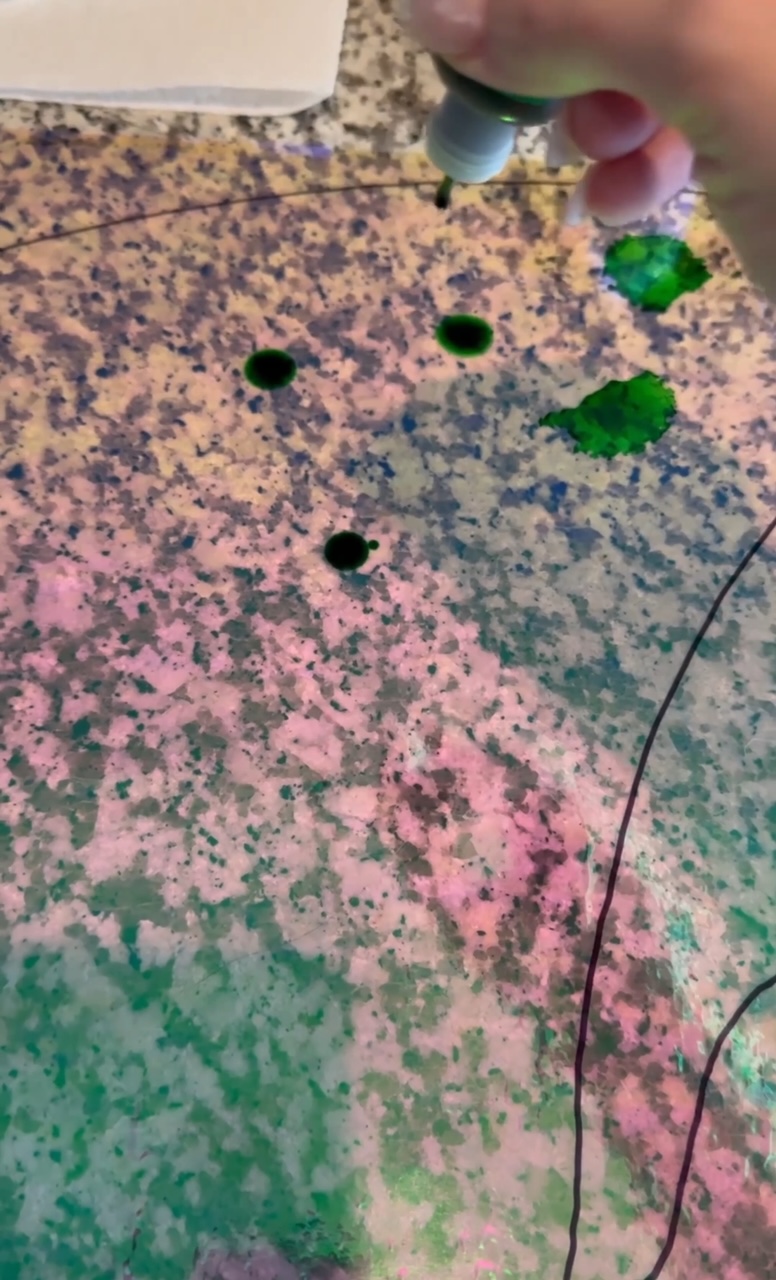
Once it’s all rolled out, trace lines with the Sharpie onto the cellphone, leaving about an inch on the outside, so you know where to paint.
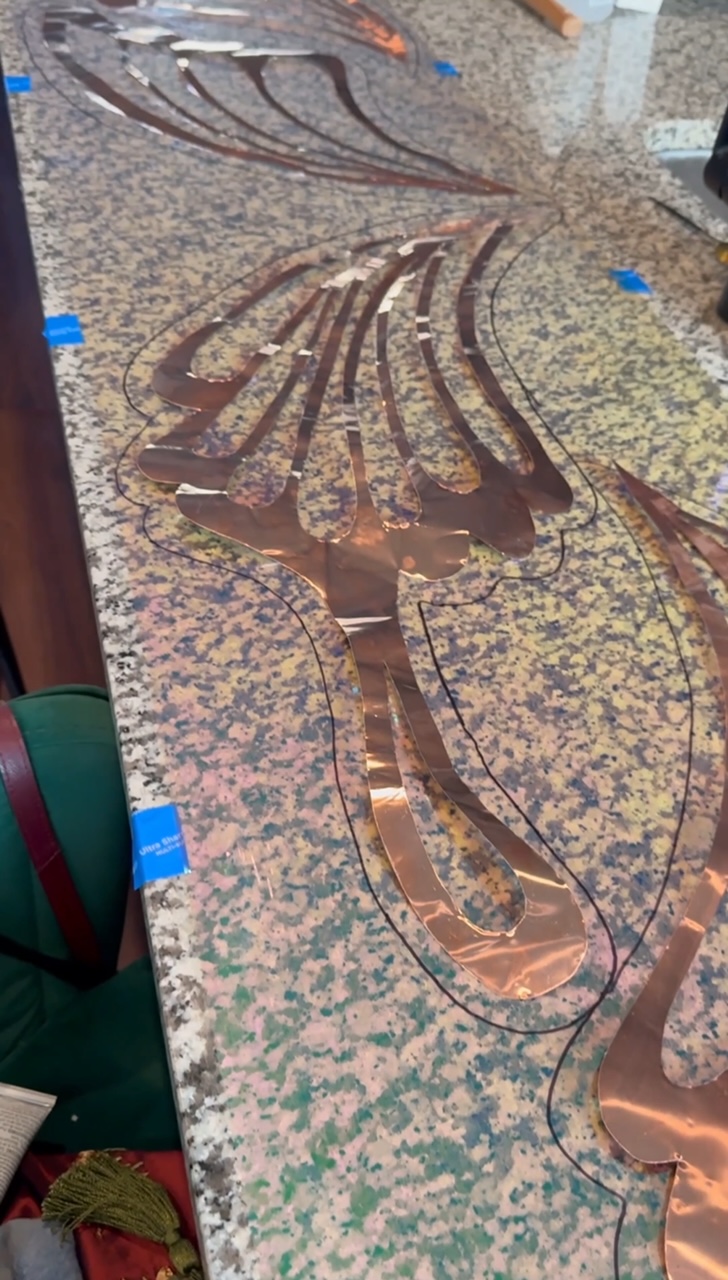
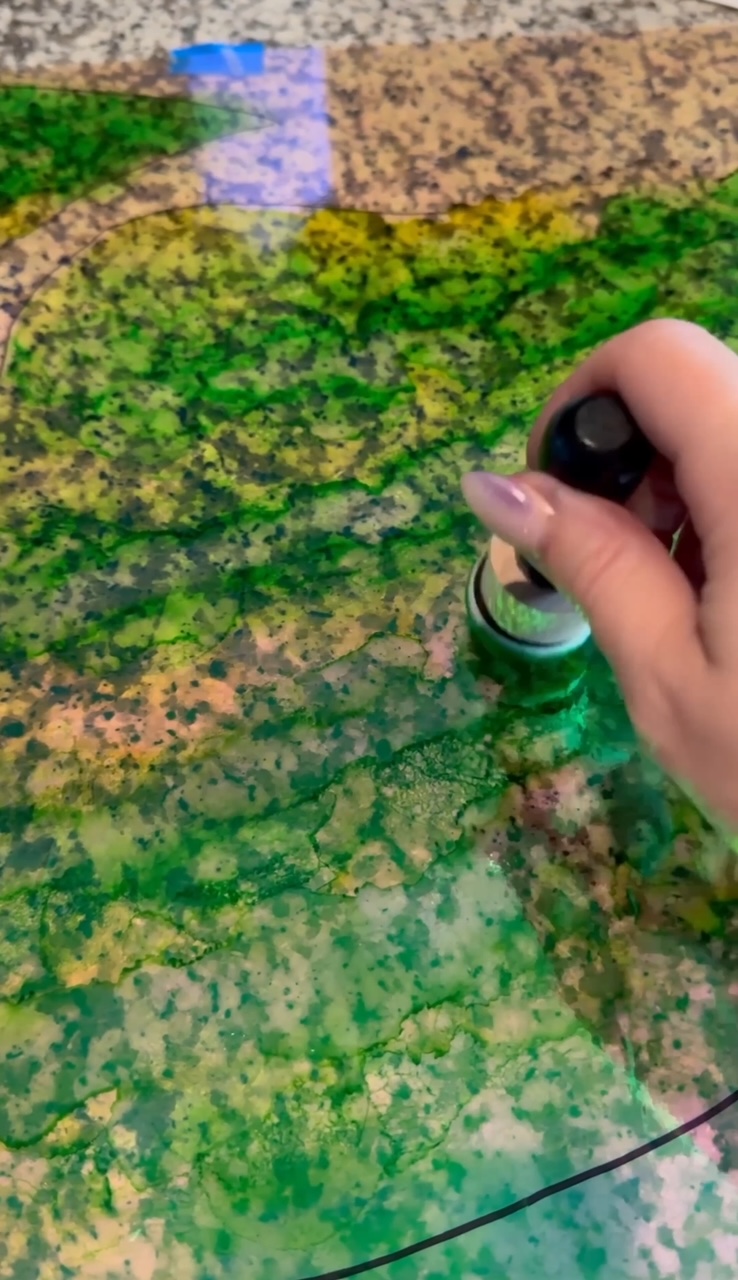
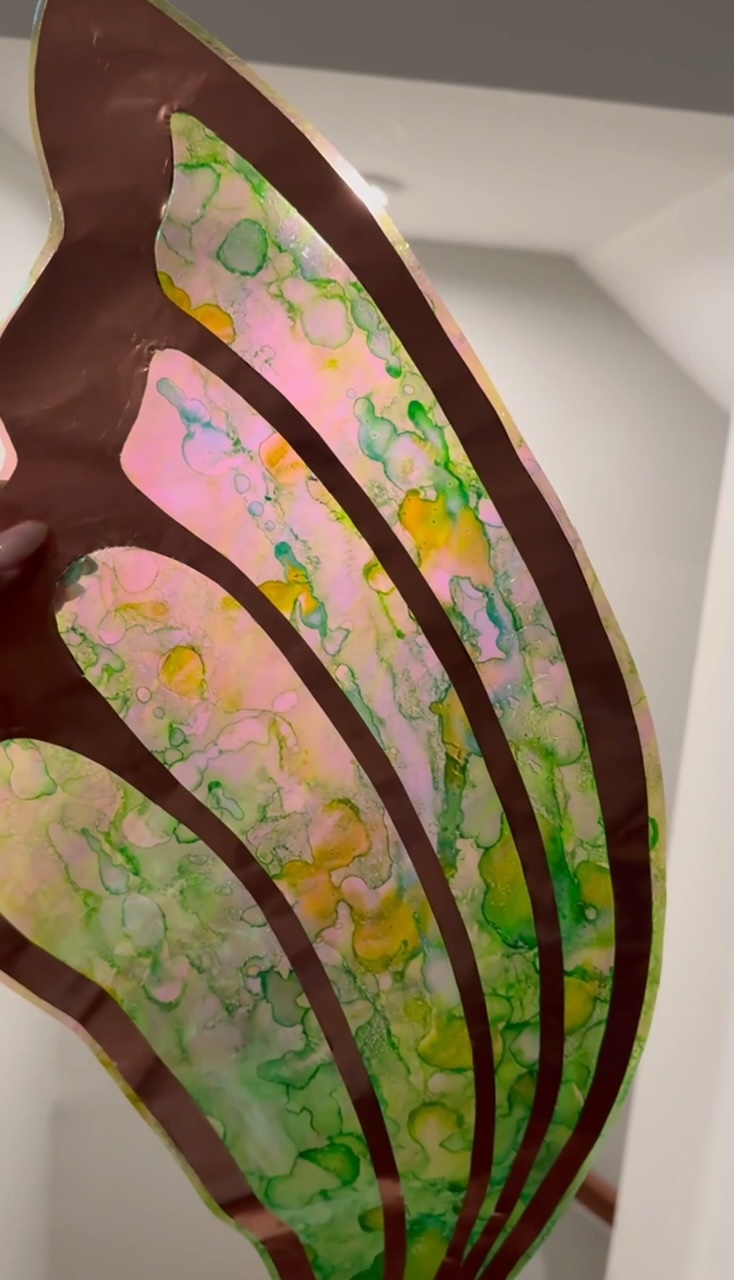
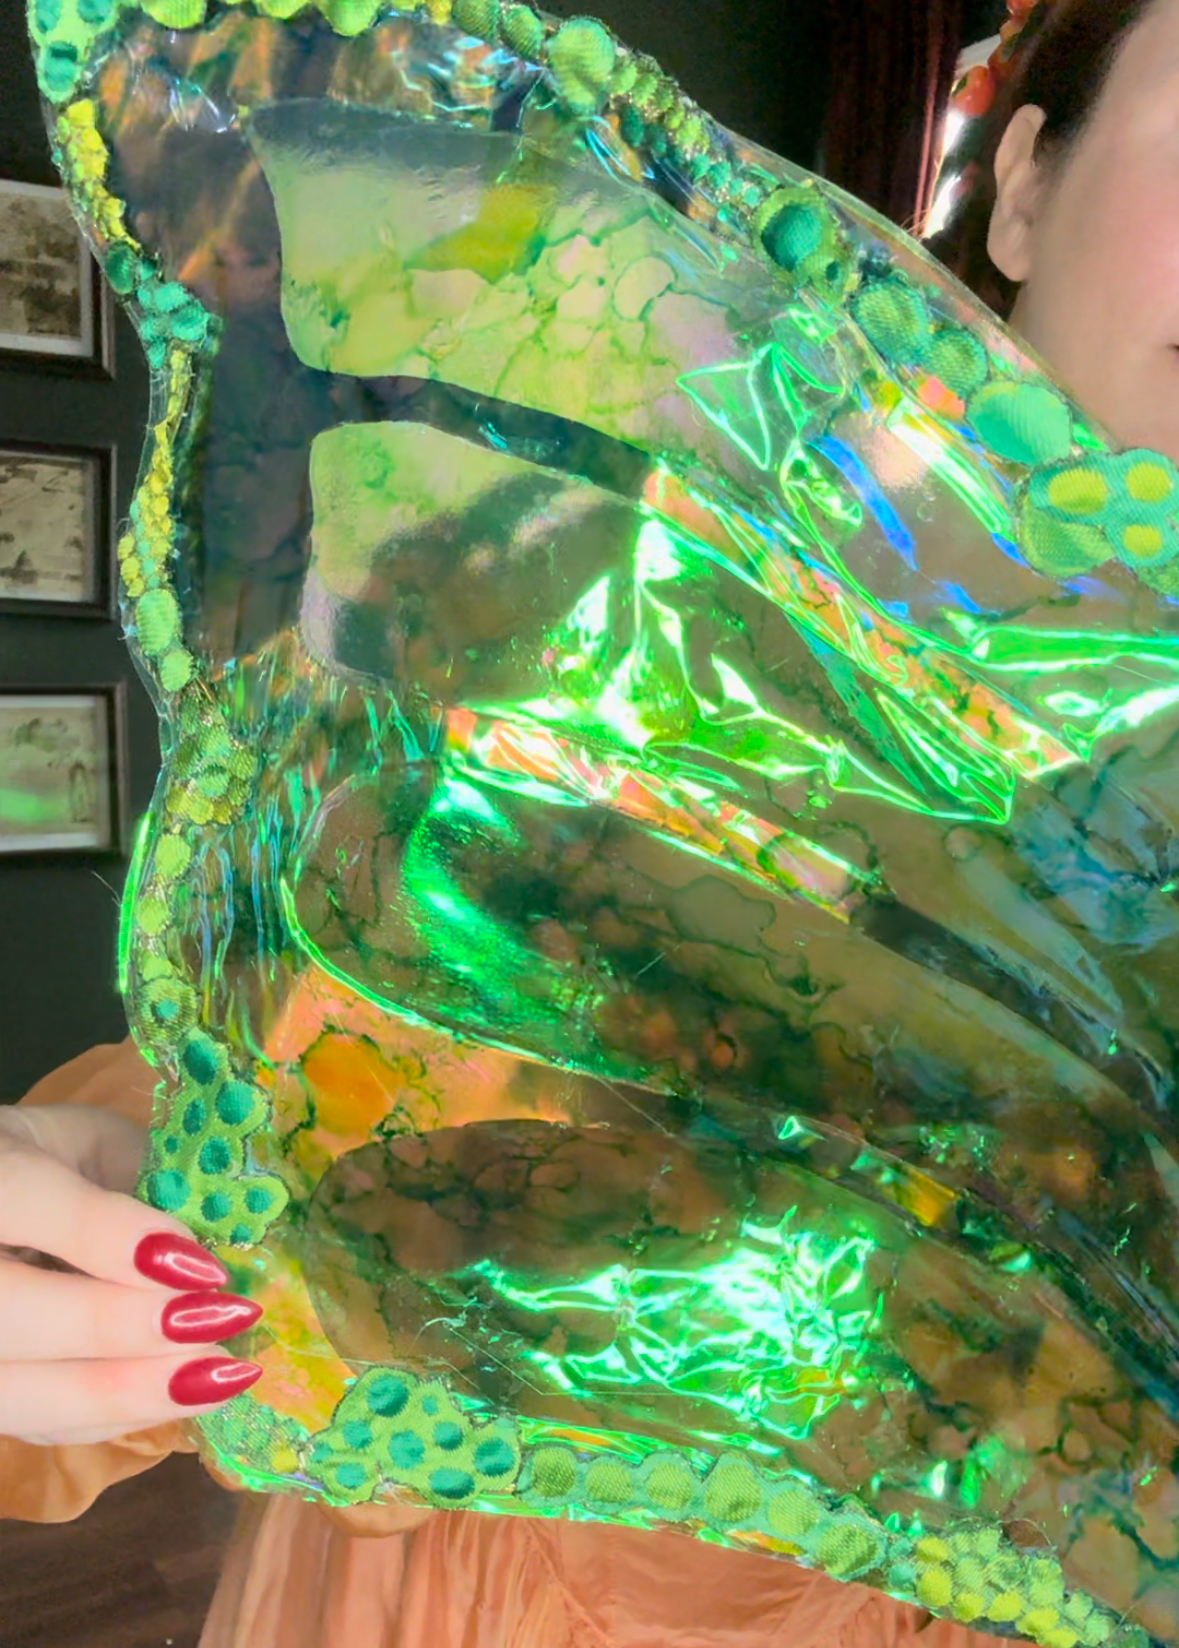
Now it’s time to paint! I did a mix of drops from the alcohol ink bottles and the blending solution and just sort of dabbed around inside the lines.
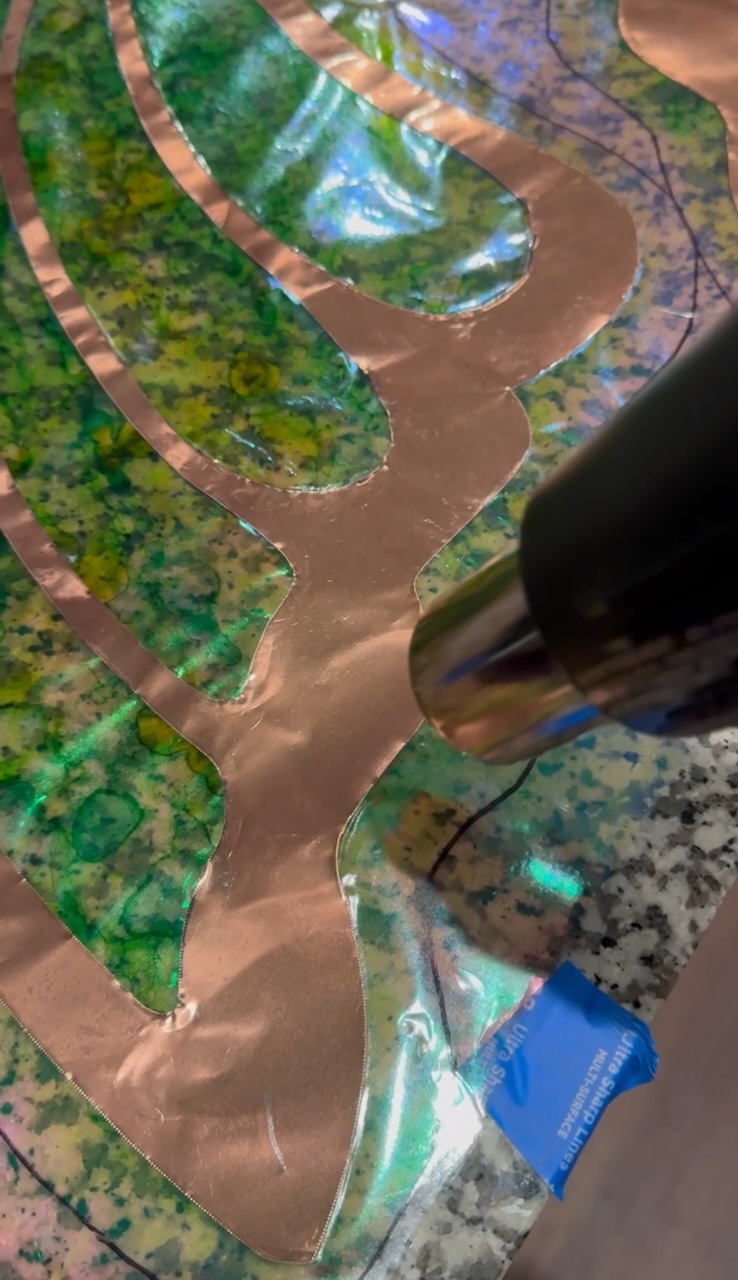
Then you’ll place the copper sheets over the painted cellophane, and carefully roll another layer of the Heat’n bond over the top (avoiding air bubbles).
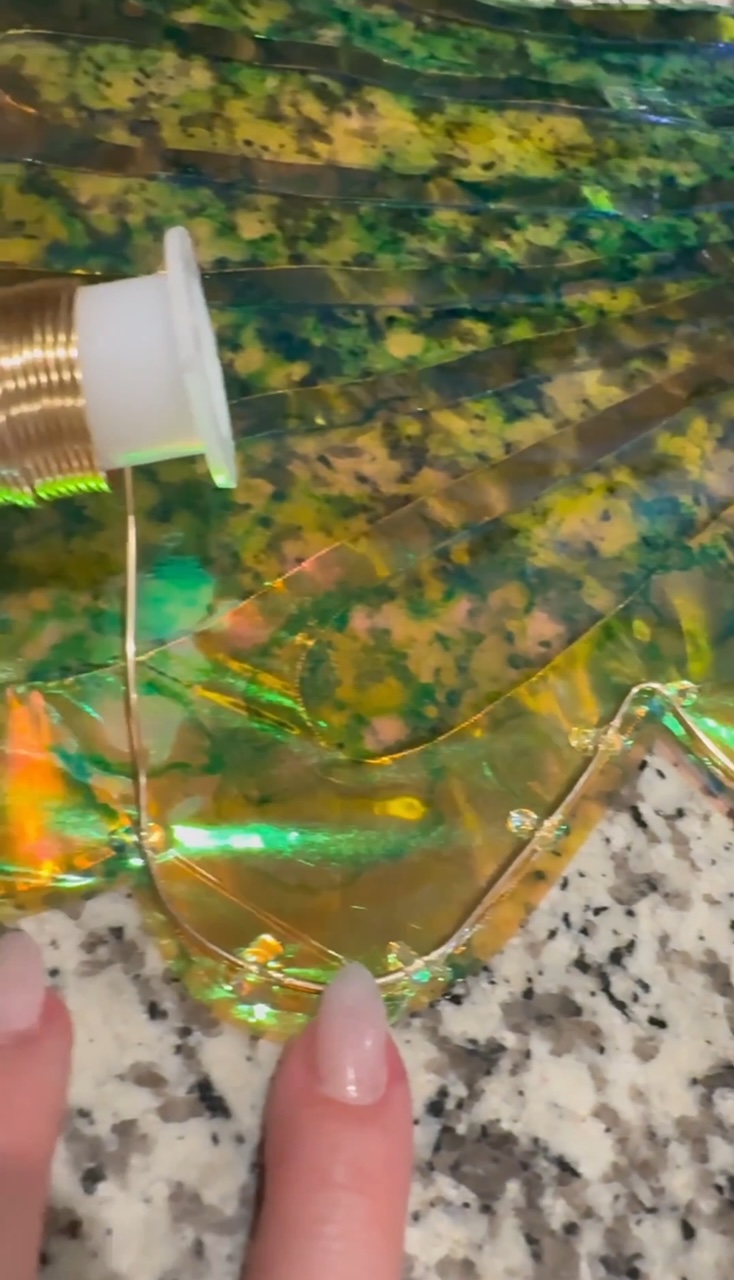
NOTE! At this point, if I could redo this project, I would’ve included some 14 gauge wire in some of the wing veins. And possible use little dabs of hot glue to hold them in place? I’m not sure how I’d do this yet though…I most definitely would added the wire along the outside perimeter at this stage. I had glue on the outside at the end and it would’ve been more secure for it to be sandwiched inside the Heat’n bond layers.
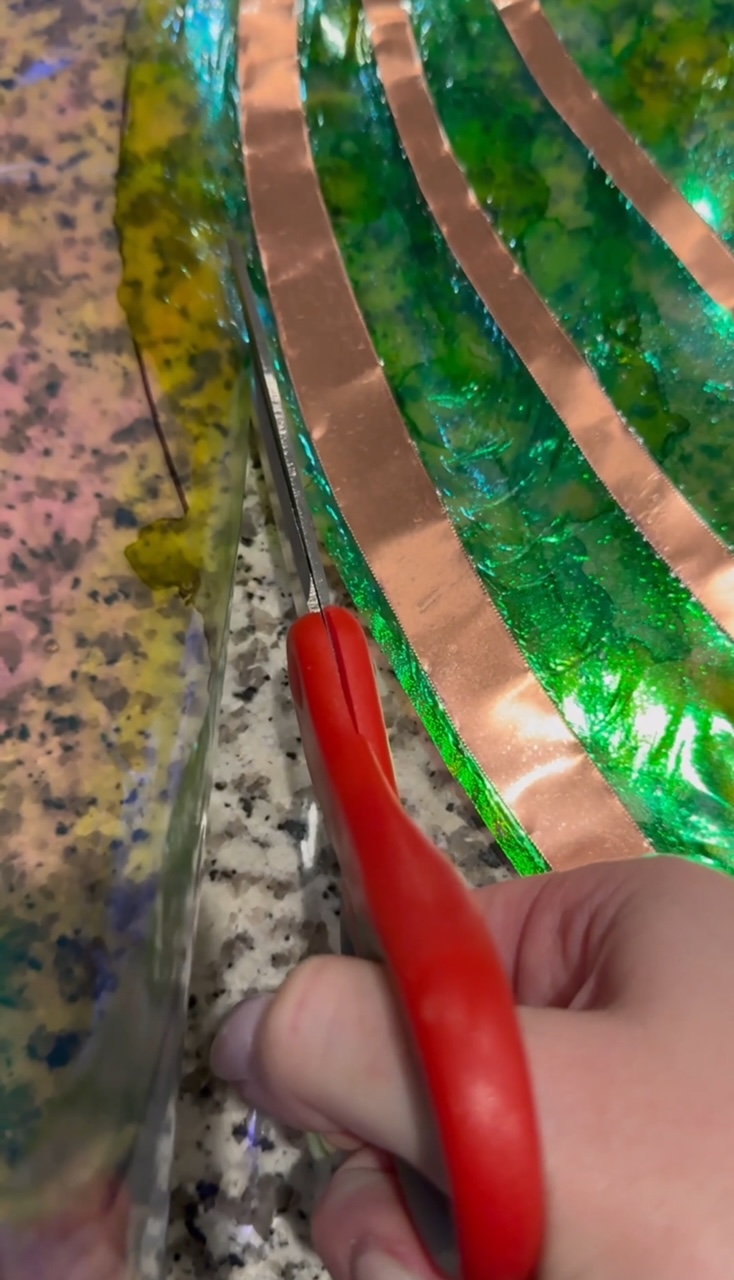
After you sandwich the layers, you’ll use a heat gun over the top so it seals together. Then I just used a pair of scissors to trim the outside, leaving about a quarter inch perimeter for the bonded edges to remain sealed.
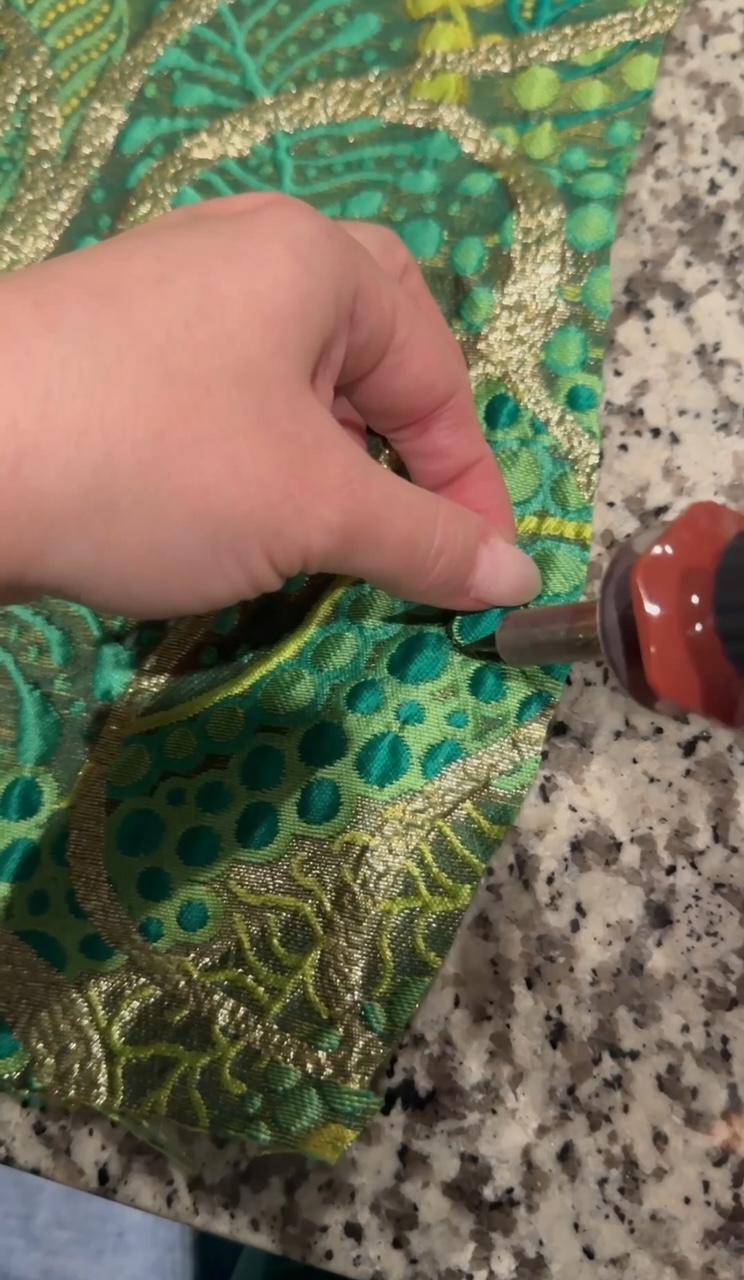
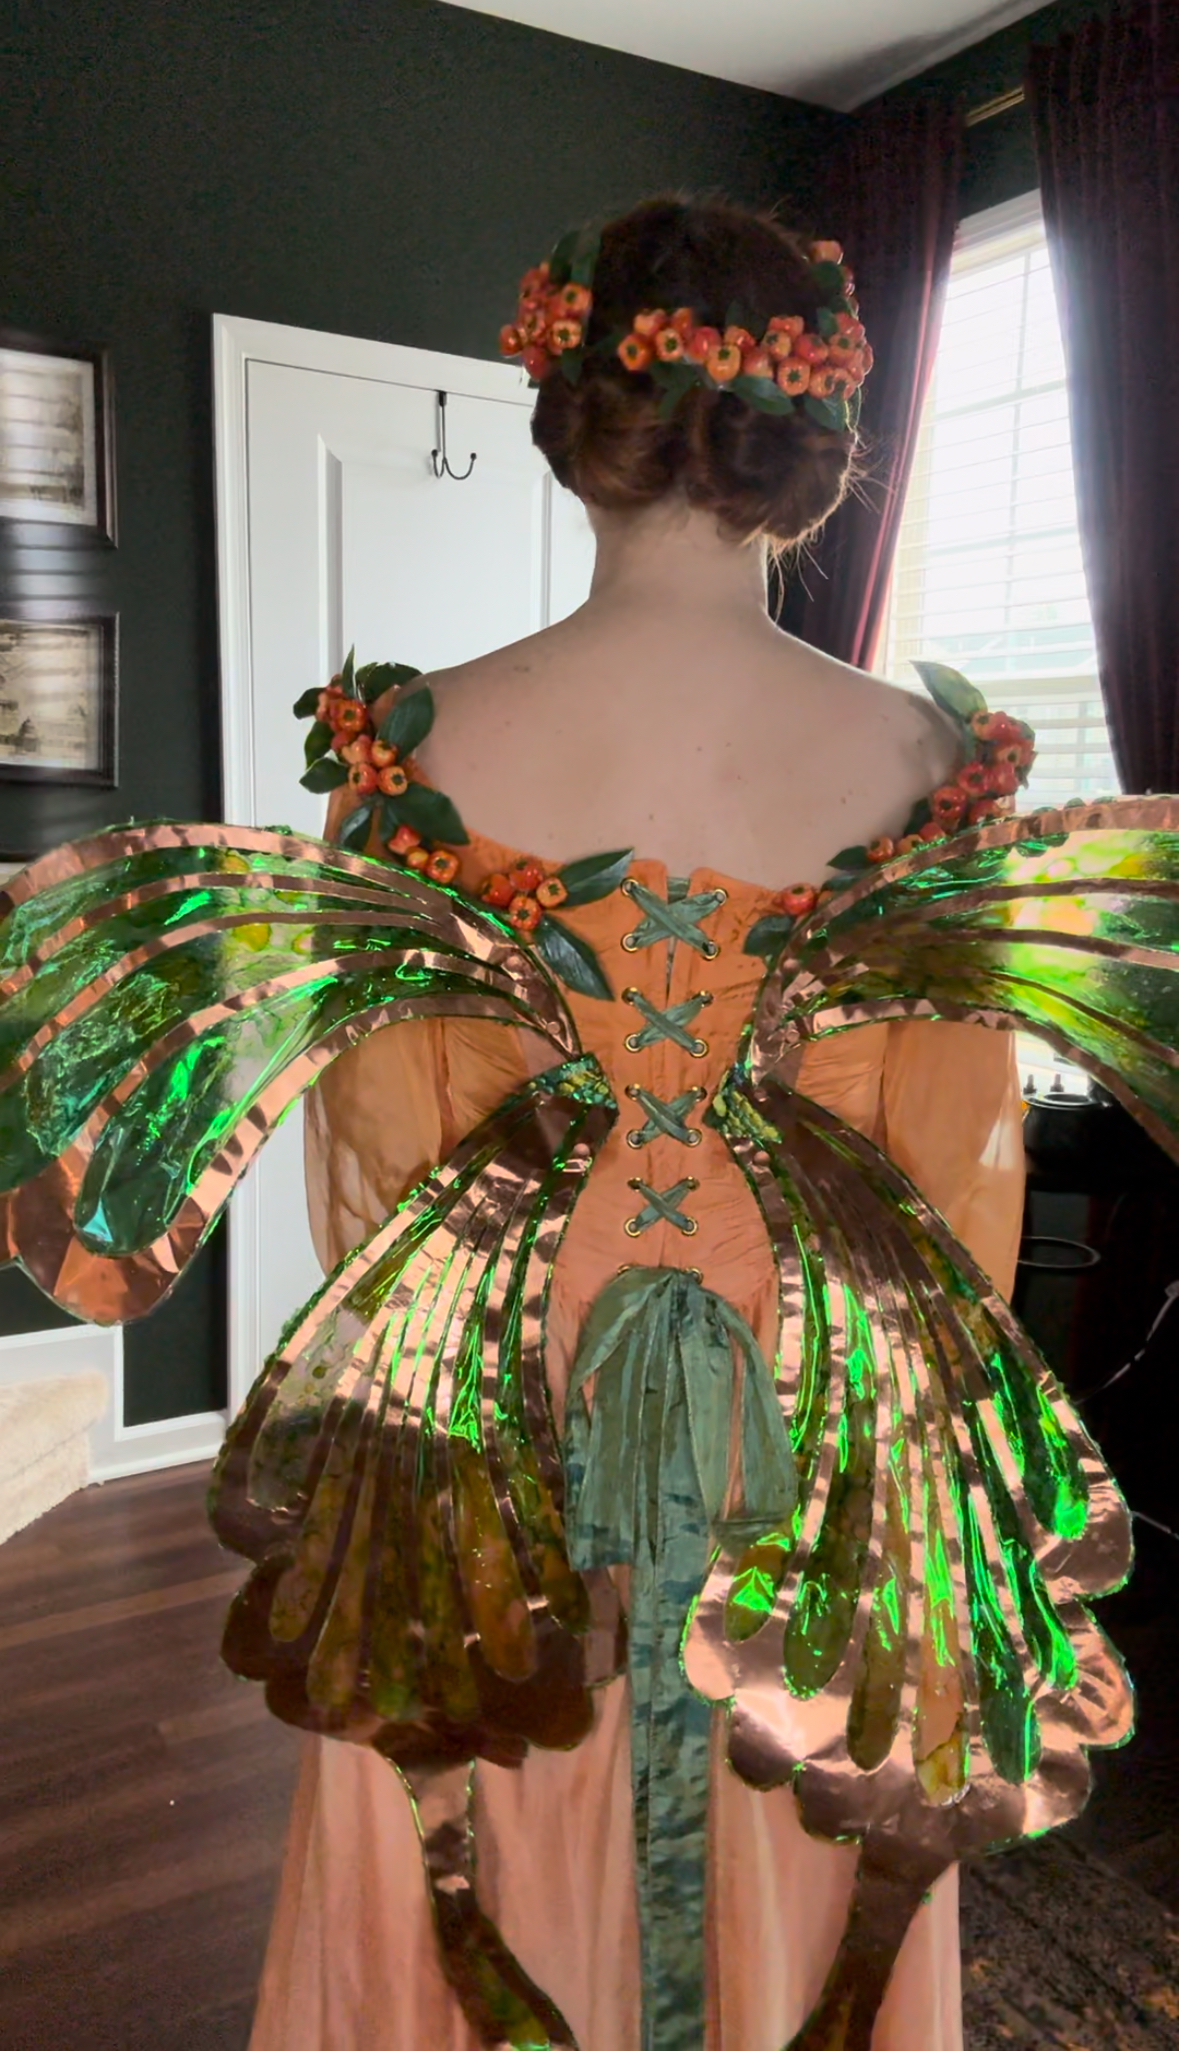
Although beautiful, this is when I realized the 36 gauge copper sheets were a little too heavy and the perimeter wasn’t as stable as I wanted, so I hot glued the 14 gauge wire around the outside. And of course that wasn’t pretty, so I used my soldering iron to cut out brocade fabric to glue over the wire to hide it. The outside brocade actually turned out very pretty!
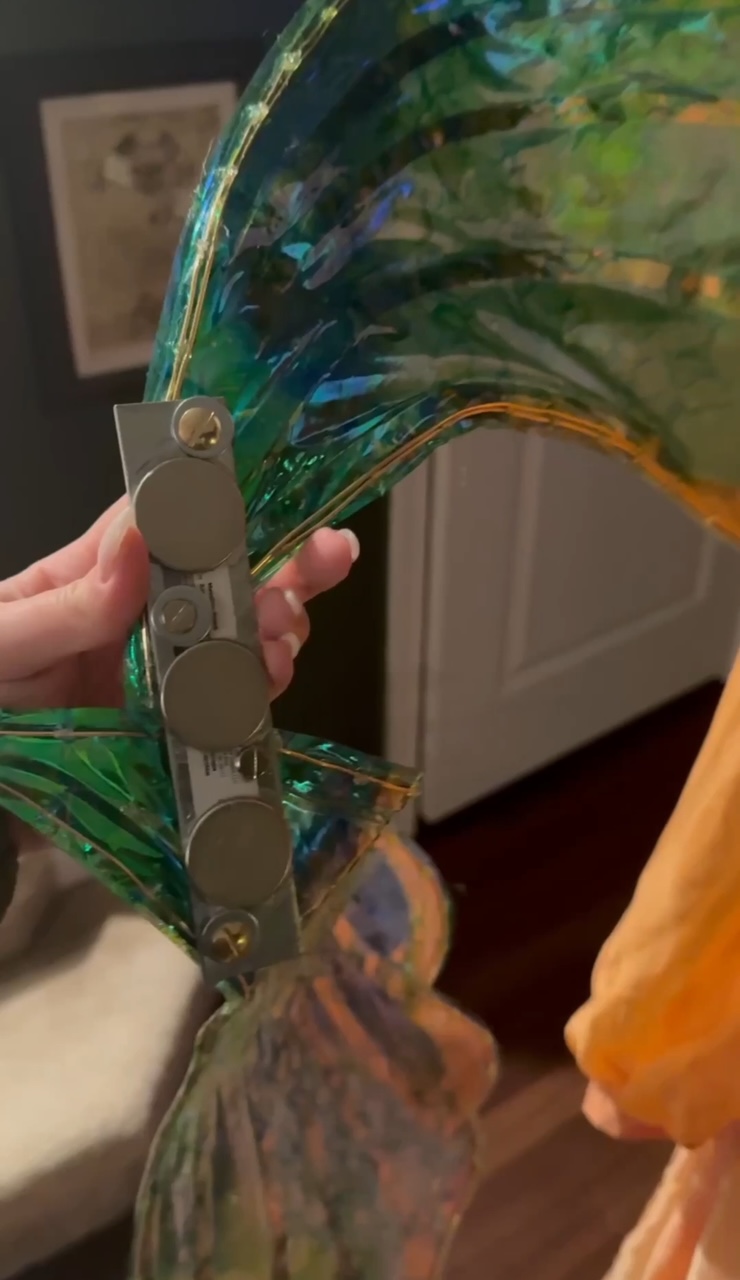
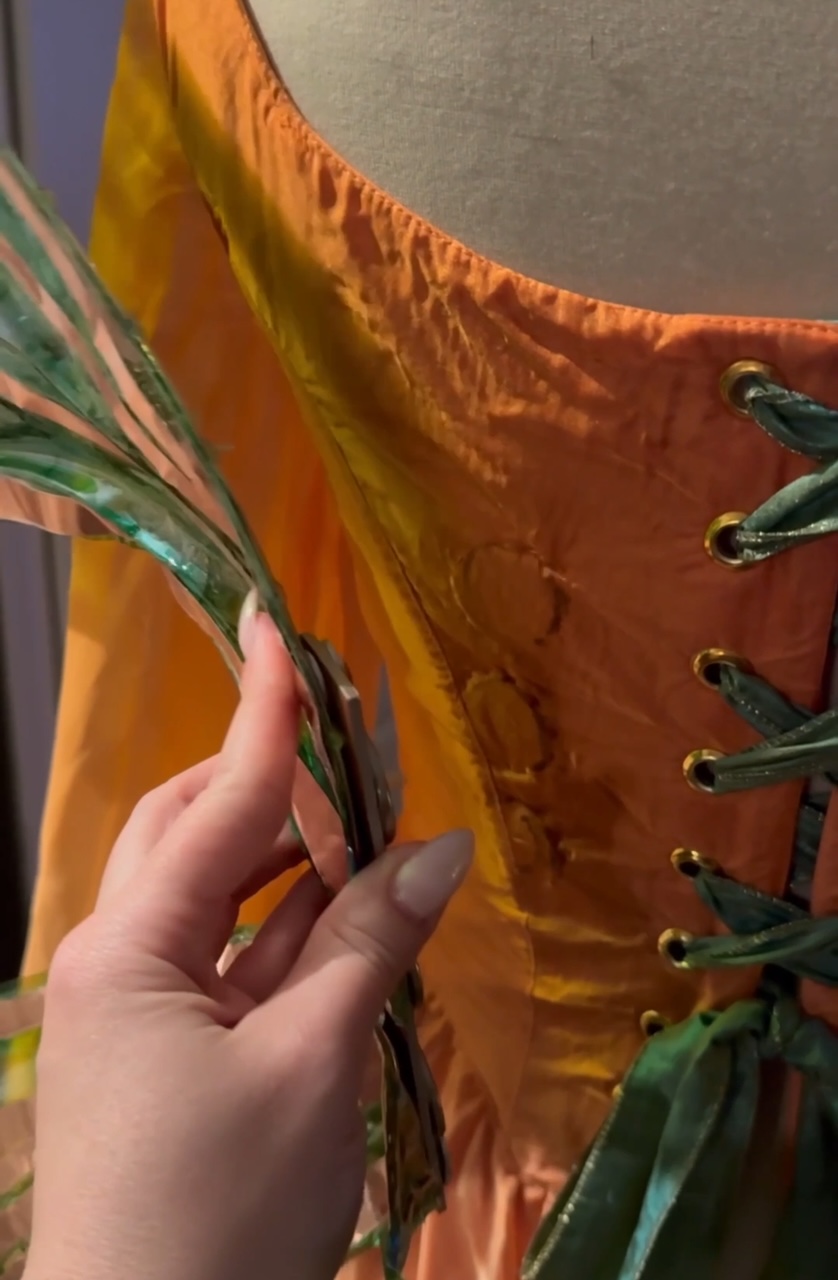
For attaching, you’ll want to use 2 mending plates as the base. I used E6000 to glue the rare earth magnets to one side of each. You might have to glue each one at a time or tape them down while they dry so the magnets don’t try to lift and stick to one another. Then you’ll hold the plate behind your wings and draw a mark to determine where you should cut the holes. Use the washers for added support so your wings don’t rip and then use the Chicago screws to attach the mending plates and washers to your wings. Lastly, I created little pockets on the inside of my dress and sewed magnets inside.

Leave a comment